Running a Node is a powerful way to get involved in the blockchain ecosystem, offering the potential for passive income while contributing to network security and decentralization. In this guide, we’ll walk you through every detail of running a 0G Labs Node—an innovative platform that supports AI data storage and provides a robust Data Availability solution for both Web2 and Web3.
What is 0G Labs?
0G Labs (also known as ZeroGravity) is a cutting-edge platform that offers Data Availability services, specifically tailored to support AI and blockchain applications. The platform has successfully raised $35 million in a Pre-Seed funding round led by Hack VC, with participation from renowned investment firms such as Delphi Ventures, Animoca Brands, and OKX Ventures. With such significant backing, 0G Labs is quickly emerging as a leading solution for data management and storage on the blockchain.
Why you should run a 0G Labs Node
By running a 0G Labs Node, you not only help maintain and secure the network but also have the opportunity to earn rewards through your participation. One of the most compelling options is to set up a Storage Node, which plays a critical role in storing data and ensuring its integrity across the network.
Step-by-step guide to running a 0G Labs Node
Here’s a detailed guide to help you set up and operate a 0G Labs Storage Node with ease.
Before diving into the setup, ensure that you have a computer or VPS (Virtual Private Server) with the following minimum specifications:
- CPU: 4 Core (to handle intensive processing tasks)
- RAM: 16 GB (to support continuous operations)
- Disk Space: 500 GB NVMe (for fast and efficient data storage)
Important: You’ll also need to create a new EVM-compatible wallet, which will be used to receive and send tokens on the 0G Labs testnet. Make sure to securely back up this wallet.
Step 1: Update Your System and Install Basic Software Packages
Open your terminal and run the following commands to update your system and install the essential tools:
sudo apt-get update
sudo apt-get install clang cmake build-essential pkg-config libssl-dev
Step 2: Install Rust – The Programming Language for Node Operation
Rust is a critical tool needed to run a 0G Labs Node. Install it by executing:
curl –proto ‘=https’ –tlsv1.2 -sSf https://sh.rustup.rs | sh
After installation, restart your terminal to apply the changes.
Step 3: Install Go – The Supporting Programming Language
Next, you’ll need to install Go, another essential programming language for running the node. Use these commands:
wget https://go.dev/dl/go1.23.0.linux-amd64.tar.gz
sudo rm -rf /usr/local/go && sudo tar -C /usr/local -xzf go1.23.0.linux-amd64.tar.gz
export PATH=$PATH:/usr/local/go/bin
The export command adds Go to your PATH environment variable, enabling you to use it in the terminal.
Step 4: Clone the 0G Storage Node Source Code from GitHub
To get started, download the 0G Storage Node source code by running:
git clone -b v0.4.6 https://github.com/0glabs/0g-storage-node.git
This command fetches the latest version of the Storage Node.
Step 5: Build the Necessary Resources
After downloading the source code, navigate to the directory containing it and execute the following command to build the required files:
cd 0g-storage-node
cargo build –release
This process will create the executable files needed to launch your Storage Node.
Step 6: Configure the Storage Node
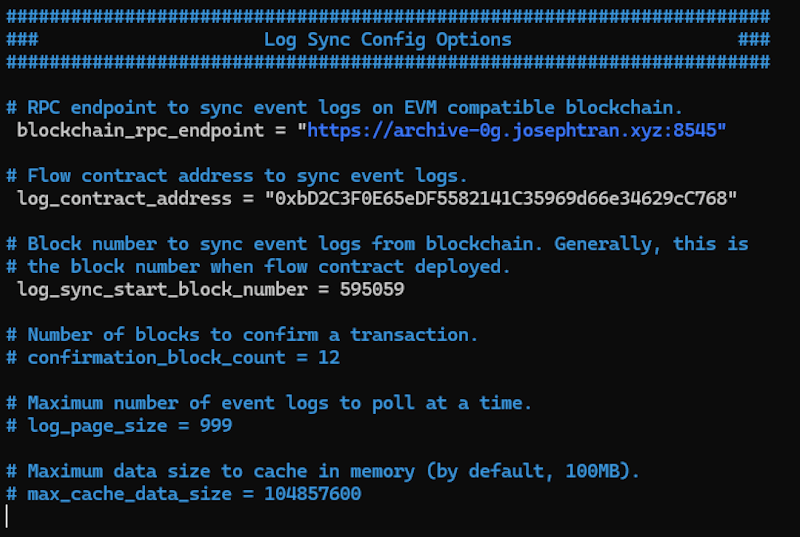
To ensure your node operates correctly, you need to edit the config.toml file. Use these commands:
cd run
nano config.toml
Inside this configuration file, you’ll find several lines starting with #. Remove the # from the lines that need to be active and fill in the following information:
- network_enr_address: Add your public IP address between the quotation marks (e.g., “123.456.78.90”).
- network_boot_nodes: Replace this with the list of official 0G Labs nodes from their documentation.
- blockchain_rpc_endpoint: Enter your RPC information or use the RPCs provided by the 0G Labs community.
- miner_key: Input the private key of your EVM wallet created earlier.
Once you’ve made the necessary changes, save the file by pressing CTRL + O, and exit by pressing CTRL + X.
Step 7: Launch the Storage Node
To launch your Storage Node, run the following command in the terminal:
../target/release/zgs_node –config config-testnet.toml –miner-key [your private key] –blockchain-rpc-endpoint [your RPC] –db-max-num-chunks 1000000000
This command will start your node and connect it to the 0G Labs network.
Step 8: Monitor Your Node’s Activity
Once the node is up and running, it’s essential to monitor its activity to ensure everything is functioning correctly. Use this command (replacing the date with the current date):
tail -f ~/0g-storage-node/run/log/zgs.log.2024-09-02
This command displays the logs from your node, allowing you to track its performance and identify any issues.
By following this comprehensive guide, you’re now well-equipped to successfully run a 0G Labs Node. If you encounter any difficulties during setup or operation, don’t hesitate to reach out to the 0G Labs community for support. Best of luck as you contribute to the network and explore the exciting opportunities that come with running your own node! Thank you for your interest in the article by Dynamic Crypto Network.


